openSUSE MicroOS: The Sustainable Home Server OS
Introduction
Running a home server 24/7 presents a unique challenge: you need reliability without constant maintenance, and efficiency without sacrificing functionality. Traditional Linux distributions require regular manual updates, can break during upgrades, and often consume more power than necessary for basic server tasks.
openSUSE MicroOS is a container-focused operating system featuring automated administration, transactional updates, and a read-only root filesystem. It’s designed specifically for unattended operation, making it ideal for home servers that need to “just work” while consuming minimal resources. In this guide, you’ll learn how to set up MicroOS for a sustainable home server that updates itself, rolls back failed changes automatically, and runs efficiently on low-power hardware.
Whether you’re hosting media services, running a personal cloud, or managing smart home automation, MicroOS offers a compelling alternative to traditional server distributions with its focus on reliability and low complexity.
Prerequisites
Before getting started with MicroOS, ensure you have:
- Hardware: Minimum 1GB RAM (2GB recommended), 10GB storage for root partition, 40GB+ for /var partition
- Compatible CPU: x86_64, aarch64 (ARM64), or ppc64le architecture
- Basic Linux knowledge: Familiarity with command line, SSH, and basic system administration
- Understanding of containers: Basic knowledge of Docker or Podman concepts
- Network access: For downloading images and container workloads
Understanding MicroOS: A Different Approach to Server OS
The Immutable Paradigm
MicroOS uses a btrfs snapshot-based system where updates apply only on reboot, avoiding any chance of breaking a running system and allowing easy automated rollback. Unlike traditional distributions where system files can change at any time, MicroOS maintains a read-only root filesystem. This fundamental design choice provides several key advantages:
System Integrity: The read-only root filesystem prevents accidental modifications and malware attacks from corrupting your base system. Configuration changes are tracked through overlayfs for /etc, while user data lives in dedicated writable subvolumes.
Transactional Updates: Updates are applied using the transactional-update command, which creates a new btrfs snapshot, applies changes there, and activates them only after reboot. Each update is atomic - either it completes successfully or has no effect on your system.
Automatic Rollback: A health-checker verifies the OS is operational after updates and automatically rolls back to the last known working snapshot if mandatory services fail to start. You never wake up to a broken server after an overnight update.
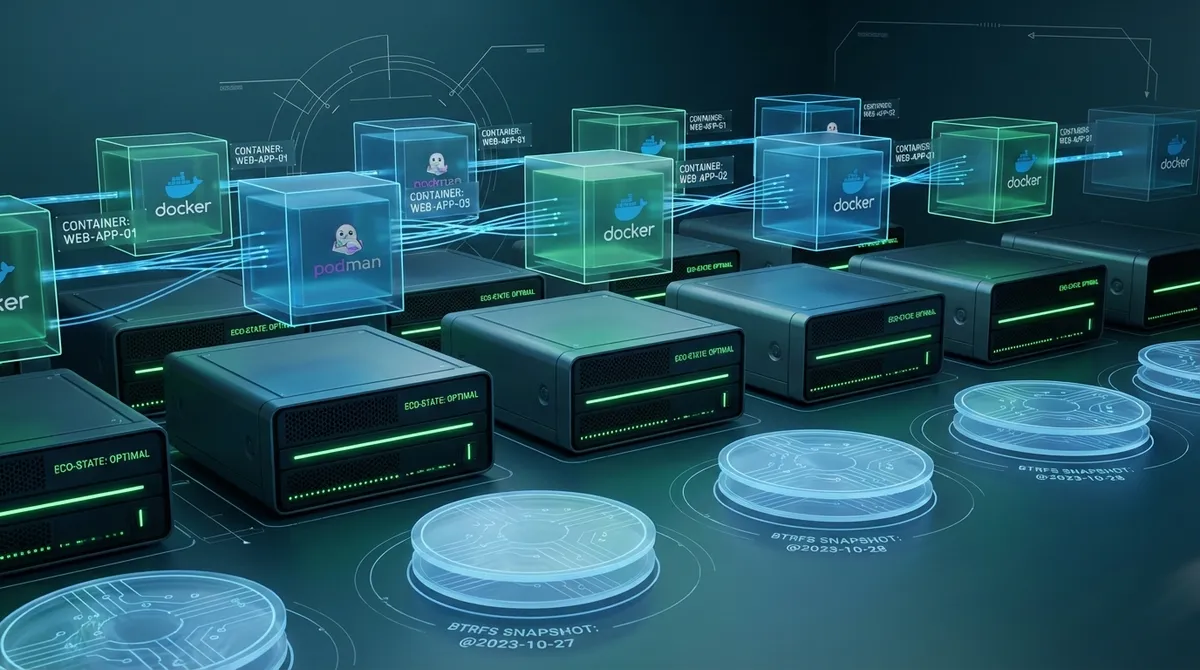
Architecture Overview
This architecture separates concerns: the base OS handles system stability and updates, while containers handle your actual workloads. This separation means you can update services independently from the OS, and vice versa.
Installation and Initial Setup
Downloading and Installing MicroOS
MicroOS offers an offline installer image, raw self-install images for customization via Combustion, and preconfigured images for various platforms including Raspberry Pi.
For a standard home server installation:
# Download the offline installer
wget https://download.opensuse.org/tumbleweed/iso/openSUSE-MicroOS-DVD-x86_64-Current.iso

# Verify the checksum
sha256sum -c openSUSE-MicroOS-DVD-x86_64-Current.iso.sha256

# Write to USB drive (replace /dev/sdX with your USB device)
sudo dd if=openSUSE-MicroOS-DVD-x86_64-Current.iso of=/dev/sdX bs=4M status=progress && sync
During installation, choose the Container Host role for a headless server. This installs the minimal package set needed for container workloads.
Important partitioning considerations:
The /var partition should be on a separate btrfs partition since snapshots with qgroups enabled would create a massive performance bottleneck for containers. Allocate at least 40GB for /var where container images and data will live.
Post-Installation Configuration
After the first boot, configure basic system settings:
# Set timezone
sudo timedatectl set-timezone Europe/Berlin

# Configure hostname
sudo hostnamectl set-hostname homeserver

# Enable SSH for remote access
sudo systemctl enable --now sshd

# Install essential tools in a new snapshot
sudo transactional-update pkg install vim tmux htop

# Reboot to activate the new snapshot
sudo reboot
Note how we use transactional-update pkg install instead of direct zypper commands - this is the MicroOS way of modifying the system.
Power Efficiency: Building a Sustainable Server
Hardware Selection for Low Power Consumption
The most sustainable server is one that uses minimal electricity. Modern mini PCs with Intel N100 processors can achieve idle power consumption as low as 7 watts, with only a 12-watt increase at full CPU utilization.
Recommended hardware characteristics:
- CPU: Modern low-power processors (Intel N100, J5005, or AMD equivalent)
- Storage: SSDs over HDDs - SATA SSDs and NVMe drives offer high performance while using less power than spinning disk drives
- RAM: 8-16GB DDR4 (DDR5 uses more power without benefits for server workloads)
- Power Supply: Efficient PSU rated for your actual load (not oversized)
Intel NUC systems can achieve under 3.5W idle consumption with proper configuration, making them excellent choices for 24/7 operation.
OS-Level Power Optimizations
MicroOS’s minimal package footprint inherently reduces power consumption:
# Check current power draw (requires powertop)
sudo transactional-update pkg install powertop
# After reboot:
sudo powertop

# Enable laptop mode for aggressive power saving
# Add to /etc/sysctl.d/laptop-mode.conf (via overlayfs)
vm.laptop_mode = 5
vm.dirty_writeback_centisecs = 6000

# Apply without reboot
sudo sysctl -p /etc/sysctl.d/laptop-mode.conf
CPU governor settings for idle-heavy workloads:
# Install cpupower tools
sudo transactional-update pkg install kernel-default-extra
# After reboot, set power-saving governor:
sudo cpupower frequency-set -g powersave
For servers with occasional high loads, the ondemand governor provides better balance, ramping up CPU speed when needed.
Monitoring Power Usage
Track your server’s energy consumption to measure improvements:
# Using systemd's power statistics
journalctl -u systemd-suspend.service

# For servers with smart power monitoring
# Install and configure prometheus node-exporter
# to track power metrics over time
The real-world impact: A homelab server consuming 60 watts running 24/7 costs approximately $45-60 per year in electricity. Reducing this to 10-15 watts through hardware selection and optimization can save $30-40 annually while significantly reducing your carbon footprint.
Container Management with Podman
Understanding Rootless Containers
MicroOS includes Podman, which runs containers without a daemon and integrates directly with systemd. Unlike Docker, Podman doesn’t require a background service, reducing attack surface and resource usage.
Rootless container benefits:
- Better security through user namespace isolation
- No need for root privileges to run containers
- User-specific container images and configurations
- Automatic UID/GID mapping prevents host system access
Setting Up Rootless Podman
# Verify rootless configuration
podman info | grep -A5 "runRoot"

# Check UID/GID mappings
grep $USER /etc/subuid /etc/subgid

# Pull your first container
podman pull docker.io/nginx:alpine

# Run a simple web server
podman run -d \
  --name web \
  -p 8080:80 \
  docker.io/nginx:alpine

# Verify it's running
podman ps
curl http://localhost:8080
Managing Containers with Systemd
The power of Podman on MicroOS comes from systemd integration. Generate systemd units for automatic container startup:
# Run a container
podman run -d \
  --name nextcloud \
  -p 8081:80 \
  -v nextcloud-data:/var/www/html \
  docker.io/nextcloud:latest

# Generate systemd unit file
mkdir -p ~/.config/systemd/user/
podman generate systemd --name nextcloud --files --new

# Move the generated file
mv container-nextcloud.service ~/.config/systemd/user/

# Enable for automatic startup
systemctl --user enable container-nextcloud.service
systemctl --user start container-nextcloud.service

# Enable lingering so containers start without login
loginctl enable-linger $USER
Practical Container Examples
Home Assistant for smart home automation:
podman run -d \
  --name homeassistant \
  --privileged \
  -p 8123:8123 \
  -v homeassistant-config:/config \
  -v /etc/localtime:/etc/localtime:ro \
  --restart=unless-stopped \
  ghcr.io/home-assistant/home-assistant:stable

# Generate and enable systemd service
podman generate systemd --name homeassistant --files --new
mv container-homeassistant.service ~/.config/systemd/user/
systemctl --user enable --now container-homeassistant.service
Pi-hole for network-wide ad blocking:
podman run -d \
  --name pihole \
  -p 53:53/tcp -p 53:53/udp \
  -p 8053:80 \
  -e TZ="Europe/Berlin" \
  -e WEBPASSWORD="secure_password_here" \
  -v pihole-etc:/etc/pihole \
  -v pihole-dnsmasq:/etc/dnsmasq.d \
  docker.io/pihole/pihole:latest

# Follow the same systemd integration steps
Container auto-updates: Podman can automatically update containers on a schedule:
# Label containers for auto-update
podman run -d \
  --label "io.containers.autoupdate=registry" \
  --name myapp \
  docker.io/myapp:latest

# Enable auto-update timer
systemctl --user enable --now podman-auto-update.timer

# Check auto-update status
systemctl --user status podman-auto-update.timer
System Maintenance and Updates
Understanding Transactional Updates
MicroOS uses transactional updates that are either fully applied or not at all, with updates not influencing the running system until reboot.
Update workflow:
# Manual update (creates new snapshot)
sudo transactional-update dup

# Install additional packages
sudo transactional-update pkg install cockpit

# Reboot to activate new snapshot
sudo reboot

# If something goes wrong, rollback is automatic
# Or manually roll back from GRUB boot menu
Configuring Automatic Updates
MicroOS can update itself automatically:
# Enable automatic updates
sudo systemctl enable --now transactional-update.timer

# Check timer status
systemctl status transactional-update.timer

# View next scheduled update
systemctl list-timers transactional-update.timer
By default, updates run daily. Configure the update strategy in /etc/transactional-update.conf:
# Edit configuration (creates overlay in new snapshot)
sudo transactional-update run vim /etc/transactional-update.conf

# Set update method
UPDATE_METHOD="dup"  # Use dist-upgrade for rolling updates

# Set reboot method
REBOOT_METHOD="auto"  # Automatically reboot after updates
Managing Snapshots
Btrfs snapshots store the filesystem history space-efficiently with all configuration files in /etc included in each snapshot.
# List all snapshots
sudo snapper list

# View snapshot differences
sudo snapper diff 1..2

# Rollback to specific snapshot
sudo snapper rollback 5
sudo reboot

# Cleanup old snapshots (automatic via policy)
sudo transactional-update cleanup
The cleanup policy automatically removes old snapshots while keeping:
- The last 10 snapshots
- Important snapshots (marked by successful boots)
- Recent snapshots from the past week
Common Pitfalls and Troubleshooting
Issue: Package Installation Doesn’t Persist
Symptom: Installed packages disappear after reboot.
Cause: Direct zypper usage instead of transactional-update.
Solution:
# Wrong approach
sudo zypper install package  # Changes not persistent!

# Correct approach
sudo transactional-update pkg install package
sudo reboot  # Activate the new snapshot
Issue: Configuration Changes Don’t Apply
Symptom: Changes to config files in /etc don’t take effect.
Cause: MicroOS uses overlayfs for /etc, with each snapshot having its own overlay.
Solution:
# Make changes in a transactional shell
sudo transactional-update shell
# Inside transactional shell:
vim /etc/systemd/system/myservice.service
exit
# Reboot to activate
sudo reboot
Issue: System Won’t Boot After Update
Symptom: System fails to start after transactional update.
Cause: Failed update or incompatible changes.
Solution: The health-checker automatically detects boot failures and rolls back to the last working snapshot. If automatic rollback doesn’t trigger:
- Boot into GRUB menu (hold Shift during boot)
- Select “openSUSE MicroOS Snapshots”
- Choose the previous working snapshot
- After boot, set it as default:
sudo snapper rollback
sudo reboot
Issue: Container Networking Problems
Symptom: Containers can’t reach the network or can’t be accessed.
Cause: Firewall blocking container traffic or misconfigured networking.
Solution:
# Check firewall status
sudo firewall-cmd --list-all

# Allow container port through firewall
sudo firewall-cmd --permanent --add-port=8080/tcp
sudo firewall-cmd --reload

# For rootless containers, ensure slirp4netns or passt is working
podman info | grep -i network
Issue: Disk Space Running Out
Symptom: /var partition filling up or snapshot quota exceeded.
Cause: Too many snapshots or large container images.
Solution:
# Check snapshot disk usage
sudo snapper list -a

# Clean up old snapshots
sudo transactional-update cleanup

# Remove unused container images
podman image prune -a

# Check btrfs usage
sudo btrfs filesystem usage /
Issue: Unable to Install Debug Tools
Symptom: Need to debug a running system but can’t install tools.
Cause: Read-only root filesystem prevents traditional package installation.
Solution: Use toolbox for temporary debugging environments:
# Install toolbox
sudo transactional-update pkg install toolbox
sudo reboot

# Run a Tumbleweed container with full tool access
toolbox create
toolbox enter

# Now inside container, install any debugging tools
sudo zypper install strace gdb tcpdump
# Use tools, then exit
exit
Real-World Performance: A Case Study
A real-world MicroOS home server setup has been running rock-solid since summer 2020 without manual intervention, with automatic updates via reboot into new snapshots. This system:
- Runs multiple containerized services (web apps, databases, media servers)
- Uses RAID 1 for data redundancy
- Consumes approximately 15W at idle
- Updates automatically without administrator intervention
- Has never required recovery from a failed update
The minimal maintenance approach provides:
- Reduced complexity: Only two layers (host OS + containers)
- Automatic recovery: Btrfs snapshots enable instant rollback
- Security isolation: Rootless containers with SELinux protection
- Low cognitive load: Simple systemd units and human-readable configs
Conclusion
openSUSE MicroOS represents a paradigm shift for home server administration: instead of fighting against system complexity, you embrace simplicity and automation. The combination of immutable infrastructure, transactional updates, and container-first design creates a server that genuinely requires minimal attention.
Key takeaways:
- Sustainability: Low power hardware (7-15W idle) combined with efficient OS design significantly reduces operational costs and environmental impact
- Reliability: Automatic rollback and atomic updates mean your server stays running even when updates go wrong
- Simplicity: Container isolation and minimal base system reduce the attack surface and maintenance burden
- Future-proof: Rolling release model means you’ll never face major version upgrades
Next steps:
- Experiment with MicroOS in a virtual machine before deploying to hardware
- Join the openSUSE MicroOS community on IRC (#opensuse-microos) or the mailing list
- Explore advanced topics like Full Disk Encryption with TPM2, remote attestation, or Kubernetes deployment
- Share your setup and contribute back to the community
The most sustainable server is one that runs efficiently, updates itself reliably, and doesn’t wake you up at 3 AM. MicroOS delivers on all three fronts.
References:
- openSUSE MicroOS Official Documentation - https://microos.opensuse.org/ - Core concepts, architecture, and design principles
- openSUSE Wiki: Portal:MicroOS - https://en.opensuse.org/Portal:MicroOS - Comprehensive guides on transactional updates, design, and configuration
- The Low-Complexity Stack: Self-Hosting with OpenSUSE MicroOS and Podman - https://www.lackhove.de/blog/selfhosting/ - Real-world production deployment case study
- openSUSE MicroOS Blog - https://microos.opensuse.org/blog/ - Latest features including Full Disk Encryption, systemd-boot, and security updates
- Tips For Building a More Power Efficient Homelab - https://blog.patshead.com/2024/04/tips-for-building-a-more-power-efficient-homelab.html - Detailed power optimization strategies and measurements
- Podman Official Documentation - https://podman.io/docs - Container management and rootless configuration
.