JupyterLab for Teaching Kids Programming: A Parent's Guide
Introduction
Getting kids excited about programming can feel like an uphill battle. Traditional text-based coding environments often overwhelm young learners with abstract concepts, cryptic error messages, and a lack of visual feedback. But what if you could give them a programming environment where code comes alive with colors, shapes, and interactive controls?
JupyterLab offers exactly that experience. Originally designed for data scientists, this browser-based development environment has emerged as a powerful teaching tool for introducing children to programming. By combining runnable code with text explanations, images, and interactive visualizations all in one document, JupyterLab makes programming tangible and immediately rewarding for young minds.
In this guide, you’ll learn how to set up JupyterLab for teaching kids programming, discover age-appropriate activities that keep them engaged, and understand how to leverage interactive widgets and visual feedback to make abstract programming concepts concrete and fun.
Prerequisites
Before getting started with JupyterLab for teaching kids, you’ll need:
- Python 3.8 or later installed on your computer (Windows, Mac, or Linux)
- Basic computer literacy - ability to open a terminal/command prompt and run commands
- A modern web browser - Chrome, Firefox, Safari, or Edge (latest versions)
- At least 4GB of RAM for smooth operation
- Basic understanding of your child’s skill level - reading ability, typing speed, and comfort with computers
Recommended but optional:
- A conda/mamba package manager for easier environment management
- A dedicated learning space free from distractions
- A second screen or tablet for displaying tutorial materials
Understanding JupyterLab’s Learning Advantage
JupyterLab revolutionizes how kids learn programming through three core features that align perfectly with how children learn best:
Immediate Visual Feedback
Traditional programming requires kids to write entire programs before seeing results. JupyterLab’s notebook cells let them execute small code snippets instantly. When a 7-year-old types print("Hello, World!") and immediately sees the output appear below their code, the cause-and-effect relationship becomes crystal clear. This instant gratification keeps young learners motivated and engaged.
Literate Programming for Context
Notebooks blend code with explanatory text, images, and diagrams. You can create a story-like learning experience where each programming concept is introduced with context, examples, and visual aids. A child learning about loops doesn’t just see abstract code—they see pictures, analogies, and step-by-step explanations that make the concept click.
Interactive Experimentation Space
JupyterLab encourages a “tinker and explore” mindset. Kids can modify existing code, rerun cells to see what changes, and experiment without fear of breaking anything. Made a mistake? Simply edit the cell and run it again. This safe sandbox environment builds confidence and encourages the trial-and-error learning that’s essential for understanding programming.
Setting Up JupyterLab for Kids
Installation Methods
Option 1: Using pip (Recommended for most users)
Open your terminal or command prompt and run:
# Create a virtual environment (recommended)
python -m venv jupyter-kids-env

# Activate the environment
# On Windows:
jupyter-kids-env\Scripts\activate
# On Mac/Linux:
source jupyter-kids-env/bin/activate

# Install JupyterLab
pip install jupyterlab

# Install helpful packages for kids
pip install ipywidgets matplotlib numpy
Option 2: Using Anaconda (Easiest for beginners)
If you have Anaconda installed, it comes with JupyterLab pre-installed. Simply open Anaconda Navigator and click the JupyterLab launch button, or run:
conda install -c conda-forge jupyterlab
conda install -c conda-forge ipywidgets
First Launch
Start JupyterLab by running:
jupyter labYour default browser will automatically open to http://localhost:8888/lab. You’ll see the JupyterLab interface with a file browser on the left and a launcher tab in the center.
Creating a Kid-Friendly Workspace
Before your first teaching session, create a dedicated folder structure:
# Create a learning workspace
mkdir -p ~/kid-coding/lessons
mkdir -p ~/kid-coding/projects
mkdir -p ~/kid-coding/experiments
Inside JupyterLab, navigate to this folder and create your first notebook:
- Click the ”+” button in the file browser
- Select “Python 3 (ipykernel)” under the Notebook section
- Name it something engaging like “My_First_Programs.ipynb”
Age-Appropriate Learning Activities
For Ages 6-8: Visual and Interactive Programming
At this age, kids need concrete, visual programming experiences. Focus on activities that produce immediate, colorful results.
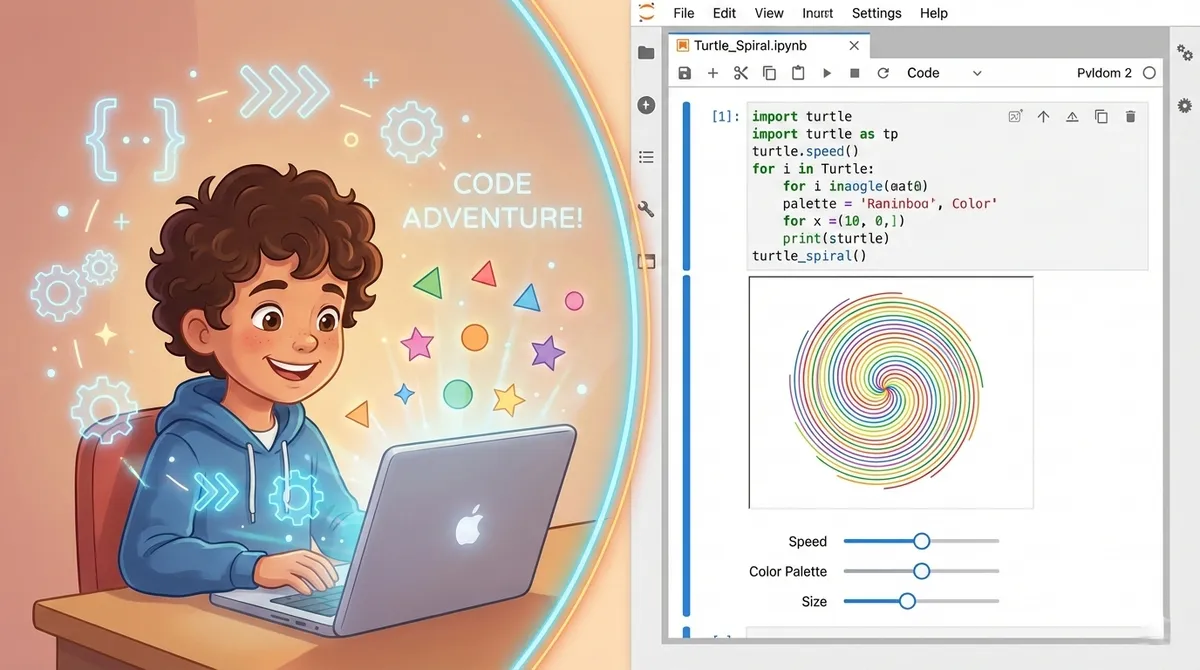
Activity 1: Drawing with Code
Install a Jupyter-compatible turtle graphics library:
pip install ipyturtle3Create a notebook with this starter code:
from ipyturtle3 import Turtle

# Create our turtle
t = Turtle()

# Draw a square
for i in range(4):
    t.forward(100)  # Move forward 100 pixels
    t.right(90)     # Turn right 90 degrees
Kids can modify the numbers and immediately see how it affects the drawing. Challenge them to create triangles, stars, or their own shapes.
Activity 2: Interactive Color Mixer
Use ipywidgets to create an interactive color explorer:
import ipywidgets as widgets
from IPython.display import display, HTML

# Create color sliders
red = widgets.IntSlider(min=0, max=255, value=128, description='Red:')
green = widgets.IntSlider(min=0, max=255, value=128, description='Green:')
blue = widgets.IntSlider(min=0, max=255, value=128, description='Blue:')

# Function to show the color
def show_color(r, g, b):
    color_html = f'<div style="width:200px; height:200px; background-color:rgb({r},{g},{b}); border:2px solid black;"></div>'
    display(HTML(color_html))

# Connect sliders to the display function
output = widgets.interactive_output(show_color, {'r': red, 'g': green, 'b': blue})

# Display everything
display(red, green, blue, output)
This teaches basic concepts (variables, functions, parameters) through a fun, visual interface.
For Ages 9-11: Logic and Problem-Solving
Middle elementary students can handle more abstract concepts when presented with engaging challenges.
Activity 1: Interactive Math Quiz
import random
import ipywidgets as widgets

def create_math_quiz():
    # Generate random numbers
    num1 = random.randint(1, 10)
    num2 = random.randint(1, 10)
    correct_answer = num1 + num2

    # Create the question
    question = widgets.HTML(f"<h2>What is {num1} + {num2}?</h2>")

    # Create answer input
    answer_input = widgets.IntText(description="Answer:")
    check_button = widgets.Button(description="Check Answer")
    result = widgets.HTML("")

    # Check answer function
    def check_answer(btn):
        if answer_input.value == correct_answer:
            result.value = "<p style='color:green;font-size:20px;'>✓ Correct! Great job!</p>"
        else:
            result.value = f"<p style='color:red;font-size:20px;'>✗ Try again! The answer is {correct_answer}</p>"

    check_button.on_click(check_answer)

    # Display everything
    display(question, answer_input, check_button, result)

create_math_quiz()
This introduces functions, conditionals, and event handling through an interactive game.
Activity 2: Story Generator
import random
import ipywidgets as widgets

# Word lists
heroes = ['brave knight', 'clever wizard', 'friendly dragon', 'curious robot']
places = ['enchanted forest', 'floating castle', 'underwater city', 'space station']
items = ['magic sword', 'glowing crystal', 'ancient map', 'mysterious book']
actions = ['discovered', 'found', 'rescued', 'protected']

def generate_story():
    story = f"Once upon a time, a {random.choice(heroes)} went to the {random.choice(places)}. "
    story += f"There they {random.choice(actions)} a {random.choice(items)} and saved the day!"
    return story

# Create interactive button
story_button = widgets.Button(description="Tell Me a Story!")
story_output = widgets.HTML()

def on_button_click(btn):
    story_output.value = f"<div style='padding:20px; background:#f0f0f0; border-radius:10px;'><p style='font-size:16px;'>{generate_story()}</p></div>"

story_button.on_click(on_button_click)
display(story_button, story_output)
This teaches lists, randomization, and string manipulation while creating endless entertainment.
For Ages 12+: Real Programming Concepts
Older children can handle more complex projects that teach professional programming practices.
Activity: Simple Game with Score Tracking
import ipywidgets as widgets
from IPython.display import display, clear_output
import random

class NumberGuessingGame:
    def __init__(self):
        self.secret_number = random.randint(1, 100)
        self.attempts = 0
        self.max_attempts = 7

    def setup_ui(self):
        # Create UI components
        self.title = widgets.HTML("<h1>🎯 Number Guessing Game</h1>")
        self.instructions = widgets.HTML(
            f"<p>I'm thinking of a number between 1 and 100. You have {self.max_attempts} tries!</p>"
        )
        self.guess_input = widgets.IntText(description="Your Guess:", min=1, max=100)
        self.submit_button = widgets.Button(description="Submit Guess", button_style='primary')
        self.feedback = widgets.HTML()
        self.new_game_button = widgets.Button(description="New Game", button_style='success')

        # Connect button to function
        self.submit_button.on_click(self.check_guess)
        self.new_game_button.on_click(self.reset_game)

        # Display UI
        display(self.title, self.instructions, self.guess_input,
                self.submit_button, self.feedback, self.new_game_button)

    def check_guess(self, btn):
        self.attempts += 1
        guess = self.guess_input.value

        if guess == self.secret_number:
            self.feedback.value = f"<h2 style='color:green;'>🎉 Congratulations! You found it in {self.attempts} tries!</h2>"
            self.submit_button.disabled = True
        elif self.attempts >= self.max_attempts:
            self.feedback.value = f"<h2 style='color:red;'>Game Over! The number was {self.secret_number}</h2>"
            self.submit_button.disabled = True
        elif guess < self.secret_number:
            self.feedback.value = f"<p style='color:orange;'>Too low! Attempt {self.attempts}/{self.max_attempts}</p>"
        else:
            self.feedback.value = f"<p style='color:orange;'>Too high! Attempt {self.attempts}/{self.max_attempts}</p>"

    def reset_game(self, btn):
        self.secret_number = random.randint(1, 100)
        self.attempts = 0
        self.guess_input.value = 50
        self.submit_button.disabled = False
        self.feedback.value = "<p>New game started! Make your guess.</p>"

# Start the game
game = NumberGuessingGame()
game.setup_ui()
This introduces object-oriented programming, state management, and event-driven programming—all real software development concepts.
Interactive Widgets: The Secret Weapon
Interactive widgets transform static code into dynamic experiences. The ipywidgets library provides controls that make programming tangible for kids.
Essential Widgets for Teaching
import ipywidgets as widgets

# Sliders for numerical input
age_slider = widgets.IntSlider(
    value=10,
    min=1,
    max=100,
    step=1,
    description='Age:',
    continuous_update=False
)

# Dropdown for choices
favorite_color = widgets.Dropdown(
    options=['Red', 'Blue', 'Green', 'Yellow'],
    value='Blue',
    description='Color:',
)

# Text input
name_input = widgets.Text(
    value='',
    placeholder='Enter your name',
    description='Name:',
)

# Button for actions
submit_button = widgets.Button(
    description='Submit',
    button_style='success',
    icon='check'
)

# Display all widgets
display(age_slider, favorite_color, name_input, submit_button)
Creating Interactive Learning Experiences
Here’s how these widgets create better learning experiences:
This feedback loop is crucial for learning. Kids see the connection between code parameters and visual output without writing any code initially. Once they understand the concept, they can modify the code to create their own versions.
Visualization and Data Exploration
Kids are natural scientists—they love observing patterns and making discoveries. JupyterLab’s visualization capabilities tap into this curiosity.
Simple Data Visualization
import matplotlib.pyplot as plt
import numpy as np

# Create data kids can relate to
days = ['Mon', 'Tue', 'Wed', 'Thu', 'Fri']
homework_minutes = [30, 45, 20, 50, 35]

# Create a colorful bar chart
plt.figure(figsize=(10, 6))
plt.bar(days, homework_minutes, color=['red', 'orange', 'yellow', 'green', 'blue'])
plt.xlabel('Day of the Week', fontsize=12)
plt.ylabel('Homework Minutes', fontsize=12)
plt.title('My Homework This Week', fontsize=14, fontweight='bold')
plt.ylim(0, 60)

# Add the values on top of each bar
for i, (day, minutes) in enumerate(zip(days, homework_minutes)):
    plt.text(i, minutes + 2, str(minutes), ha='center', fontweight='bold')

plt.show()
Kids can modify the data to track their own activities—screen time, books read, steps walked—making data analysis personal and meaningful.
Interactive Data Explorer
import matplotlib.pyplot as plt
import ipywidgets as widgets
import numpy as np

def plot_wave(frequency, amplitude, wave_type):
    x = np.linspace(0, 4*np.pi, 1000)

    if wave_type == 'Sine':
        y = amplitude * np.sin(frequency * x)
    elif wave_type == 'Cosine':
        y = amplitude * np.cos(frequency * x)
    else:
        y = amplitude * np.sign(np.sin(frequency * x))  # Square wave

    plt.figure(figsize=(12, 4))
    plt.plot(x, y, linewidth=2)
    plt.xlabel('Time')
    plt.ylabel('Amplitude')
    plt.title(f'{wave_type} Wave: Frequency={frequency}, Amplitude={amplitude}')
    plt.grid(True, alpha=0.3)
    plt.ylim(-5, 5)
    plt.show()

# Create interactive controls
widgets.interact(
    plot_wave,
    frequency=widgets.FloatSlider(min=0.5, max=5, step=0.5, value=1, description='Frequency:'),
    amplitude=widgets.FloatSlider(min=0.5, max=4, step=0.5, value=1, description='Amplitude:'),
    wave_type=widgets.Dropdown(options=['Sine', 'Cosine', 'Square'], value='Sine', description='Wave Type:')
)
This introduces mathematical concepts visually. Kids can experiment with parameters and see how waves change—perfect for older children interested in music, physics, or math.
Common Pitfalls and Troubleshooting
Issue 1: “Kernel Not Found” or “Kernel Died”
Symptoms: Notebook won’t run code or suddenly stops working
Solutions:
- Restart the kernel: Click “Kernel” → “Restart Kernel”
- Check if Python environment is activated correctly
- Ensure
ipykernelis installed:pip install ipykernel - For kids: Explain this is like “restarting the brain of the program”
Issue 2: Import Errors for Widgets
Symptoms: ModuleNotFoundError: No module named 'ipywidgets'
Solutions:
# Install ipywidgets
pip install ipywidgets

# For JupyterLab 3.x and later, this is usually automatic
# For older versions, enable the extension:
jupyter labextension install @jupyter-widgets/jupyterlab-manager
Issue 3: Cells Execute Out of Order
Symptoms: Variables are “undefined” even though they’re in an earlier cell
Common Cause: Kids run cells in random order
Solution:
- Teach the “Run All Above” habit: Kernel → “Run All Above Selected Cell”
- Use visual cues: Add cell numbers in markdown: “Cell 1: Setup”, “Cell 2: Main Code”
- For beginners, create simple notebooks where order matters less
Issue 4: Widgets Display as Text
Symptoms: Widget code shows but no interactive controls appear
Solutions:
# Make sure widgets are properly displayed
import ipywidgets as widgets
from IPython.display import display

# Always use display() for widgets
button = widgets.Button(description='Click Me')
display(button)  # Don't forget this!
Issue 5: Notebook Won’t Save
Symptoms: Changes disappear after closing
Common Causes:
- Browser auto-save failed
- File permissions issue
- Notebook in read-only location
Solutions:
- Regularly use Ctrl+S (Cmd+S on Mac)
- Check file permissions on the notebook directory
- Avoid saving to system-protected folders
- For kids: Set up a dedicated, writable workspace folder
Teaching Tips for Common Errors
When kids encounter errors, use them as learning opportunities:
NameError: name ‘x’ is not defined
- Explain: “The computer doesn’t know what ‘x’ is yet. Did you forget to create it first?”
- Show: Run the cell that defines ‘x’ first
SyntaxError: invalid syntax
- Explain: “This is like a spelling mistake in code. Let’s check for typos!”
- Look for: Missing colons, quotes, or parentheses
IndentationError: unexpected indent
- Explain: “Python cares about spaces at the start of lines. Let’s make sure they line up!”
- Visual aid: Show how blocks of code need consistent spacing
Best Practices for Teaching with JupyterLab
1. Start with Complete, Working Examples
Never ask kids to write code from scratch initially. Provide working notebooks they can explore and modify. Change a number, see what happens. Change a word, see the effect. This builds confidence before they tackle blank cells.
2. Use Markdown Cells Generously
Create a narrative flow with markdown cells:
## Let's Draw Shapes! 🎨

First, we'll create our drawing tool called a "turtle".
Run the cell below to see it work:
Then follow with the code cell. The context helps kids understand purpose before execution.
3. Create Incremental Challenges
Structure notebooks as progressive challenges:
- Working example - Run this to see it work
- Small modification - Change one number and observe
- Guided exercise - Fill in one blank with hints
- Creative challenge - Use what you learned to create something new
4. Leverage Visual Feedback
Every concept should have a visual component when possible:
- Loops: Draw repeating patterns
- Conditionals: Show/hide elements based on conditions
- Variables: Display values in large, colorful text
- Functions: Create visible before/after transformations
5. Save Progress and Celebrate
Create a “projects” folder where kids save their best creations. Review them together, discussing what they learned. This builds portfolio thinking and gives them concrete evidence of progress.
Conclusion
JupyterLab transforms programming education from an abstract, text-based challenge into an interactive, visual learning experience that aligns with how children naturally learn—through experimentation, immediate feedback, and playful exploration. The combination of runnable code cells, rich text explanations, interactive widgets, and instant visualizations creates an environment where kids can see their ideas come to life instantly.
By starting with age-appropriate activities that emphasize visual output and interactive controls, you can hook kids on programming before introducing more abstract concepts. The notebook format allows you to create self-paced learning materials that kids can explore independently or work through with you, building both programming skills and confidence.
Key Takeaways:
- JupyterLab’s notebook format makes programming tangible through immediate visual feedback
- Interactive widgets transform abstract code into hands-on experiences
- Age-appropriate activities keep kids engaged from first exposure through advanced concepts
- Common troubleshooting issues have simple solutions that kids can learn to handle themselves
- The environment grows with the learner, supporting everything from first programs to real software development
Next Steps:
- Install JupyterLab and create your first teaching notebook
- Start with visual activities appropriate for your child’s age
- Gradually introduce more complex concepts as confidence builds
- Explore the extensive Jupyter community for teaching resources
- Consider contributing your successful teaching notebooks back to the community
The journey from first print statement to confident programmer is filled with moments of discovery, frustration, and triumph. JupyterLab provides the environment where these moments can happen naturally, supported by interactive tools that make programming feel less like work and more like play.
References:
- Teaching and Learning with Jupyter - Comprehensive guide to using Jupyter in education
- JupyterLab Documentation - Official documentation for the latest features
- ipywidgets Documentation - Complete guide to creating interactive notebooks
- Learn Python with Jupyter - Book specifically designed for learning Python in Jupyter
- Project Jupyter - Main project page with widgets examples and community resources
- Berkeley CoRE Lab: Teaching with Jupyter - Research on Jupyter in K-12 education